Ice makers are the unsung heroes of our kitchen appliances, tirelessly producing ice cubes to chill our drinks on sweltering summer days or accompany our favorite spirits. But how often do we think about the cleanliness of these hardworking machines? If you’ve ever been greeted by ice cubes that smell and taste like a science experiment gone wrong, it’s time to delve into the world of ice maker cleaning. In this comprehensive guide, we’ll explore the nitty-gritty details of why ice maker cleaning is crucial, how often you should clean it, tools and materials needed, and provide a step-by-step guide for a deep clean. Whether you have a residential or commercial ice maker, we’ve got you covered. So, let’s get started and ensure your ice maker is not only producing ice but clean and odor-free ice!
Why is Ice Maker Cleaning Important?
Ice makers, like any appliance, require regular cleaning and maintenance. Neglecting your ice maker’s cleanliness can lead to a host of issues that go beyond aesthetics. Let’s break down why ice maker cleaning is essential:
Mold and Bacteria Growth
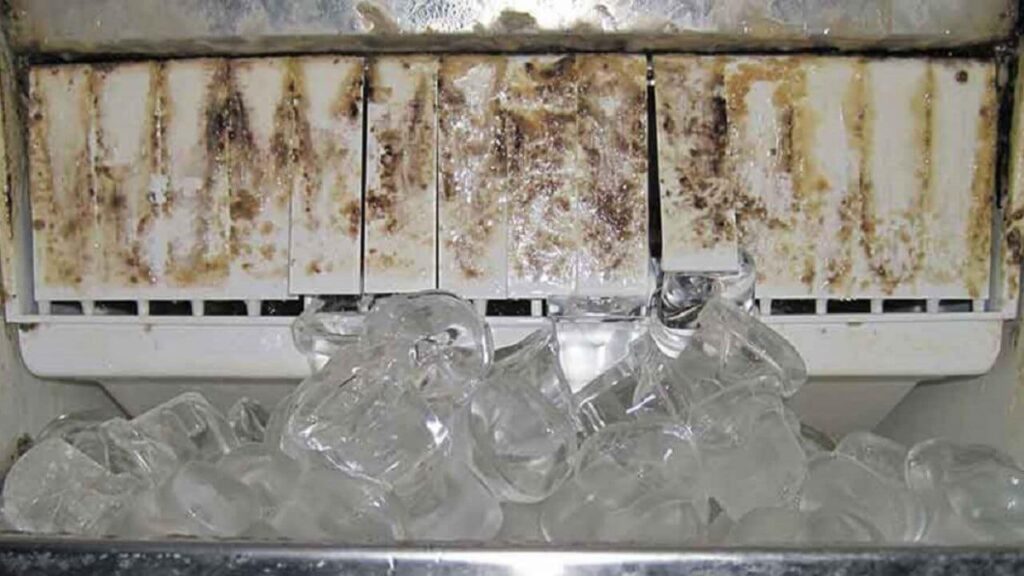
One of the primary concerns when it comes to unclean ice makers is the growth of mold and bacteria. Ice makers provide an ideal environment for these unwelcome guests to flourish. Here’s how it happens:
- Moisture: Ice makers create ice by freezing water, and this process generates moisture. Moisture, combined with the slightly warmer temperatures inside the ice maker, creates the perfect breeding ground for mold and bacteria.
- Darkness: Ice makers are usually dark and enclosed spaces, further promoting the growth of microorganisms.
- Stagnant Water: Water often sits in the reservoir and supply lines, and stagnant water is a prime location for mold and bacteria to proliferate.
Health Concerns
Consuming ice that has come into contact with mold or bacteria can pose health risks. Moldy ice can lead to allergies, respiratory issues, or gastrointestinal problems. While the risks are relatively low, it’s better to be safe and enjoy your ice without any health-related concerns.
Odor and Taste Issues
Unclean ice makers can produce ice that smells and tastes unpleasant. Bacteria and mold give off distinct odors, which can transfer to your ice cubes. No one wants their drinks tainted with these off-putting scents and flavors.
Reduced Efficiency
A dirty ice maker works less efficiently. It has to work harder to produce ice, which can lead to increased energy consumption and potential mechanical issues down the road. Keeping your ice maker clean not only ensures safe ice but also prolongs the lifespan of your appliance.
How Often Should You Clean Your Ice Maker?
The frequency of ice maker cleaning depends on various factors, including the type of ice maker and its usage. Let’s break it down:
Residential Use
For most residential ice makers, a general rule of thumb is to clean them every three to six months. However, certain conditions may require more frequent cleaning:
- High Usage: If your ice maker sees heavy use, especially during warm seasons, it’s a good idea to clean it more often.
- Humid Environments: Living in a humid climate can accelerate mold and bacteria growth, so consider more frequent cleaning in such conditions.
- Visual Clues: If you notice mold, strange odors, or discolored ice, don’t wait for the scheduled cleaning—act immediately.
Commercial Use
Commercial ice makers, which produce ice on a larger scale, require more frequent cleaning. A general guideline is a monthly deep clean. The increased workload and exposure to potential contaminants in commercial settings necessitate this rigorous maintenance schedule.
Visual Clues
Regardless of whether you have a residential or commercial ice maker, always pay attention to visual clues. If you see mold, experience strange odors, or find discolored ice, don’t procrastinate. Cleaning your ice maker promptly is essential.
Tools and Materials for Ice Maker Cleaning

Before you embark on your ice maker cleaning journey, gather the necessary tools and materials. Having the right equipment ensures a thorough and effective cleaning process. Here’s a list of what you’ll need:
| Tools and Materials | Description |
| Warm, soapy water | A mild dish soap will do. |
| Soft cloth or sponge | For scrubbing and wiping. |
| Vinegar or lemon juice | A natural, effective cleaner. |
| Sanitizing solution | Specifically for ice makers. |
| Old toothbrush | For hard-to-reach areas. |
| Towels | For drying the interior. |
Step-by-Step Guide to Ice Maker Cleaning
Now that you’ve gathered your cleaning arsenal, let’s get down to the nitty-gritty with a comprehensive, step-by-step guide to cleaning your ice maker and preventing mold and odor:
Step 1: Safety First
Safety should be your top priority. Before you start cleaning, ensure that your ice maker is unplugged. Dealing with electrical components while cleaning can be dangerous, so always disconnect the power source.
Step 2: Remove Ice and Unplug
Start the cleaning process by emptying the ice bin and disconnecting the ice maker from the power source. This creates a safe environment for deep cleaning.
Step 3: Disassemble
If your ice maker has removable parts, such as the ice bin, water filter, or ice scoop, take them out. This disassembly will make it easier to access all the nooks and crannies that require cleaning.
Step 4: Clean the Ice Bin
Begin with the ice bin. Wash it with warm, soapy water, using a soft cloth or sponge to scrub away any residue or contaminants. Rinse the bin thoroughly with clean water, and then dry it with a clean towel.
Step 5: Attack Mold and Mildew
To combat mold and mildew, prepare a solution of equal parts water and either white vinegar or lemon juice. Use an old toothbrush to scrub any areas with visible mold or mildew. Pay particular attention to corners, crevices, and areas that are difficult to reach with a cloth or sponge.
Step 6: Interior Wipe Down
Continue using the vinegar or lemon juice solution to wipe down the interior of the ice maker. Ensure that you reach all the inner surfaces, as this will help eliminate any lurking bacteria that cause odors.
Step 7: Sanitize
It’s crucial to sanitize all components of the ice maker using a solution specifically designed for this purpose. Follow the manufacturer’s instructions carefully to ensure thorough sanitization. This step is vital to guarantee that your ice remains safe to consume.
Step 8: Rinse and Dry
After sanitizing, rinse all components with clean water to remove any remaining traces of cleaning agents. Dry them thoroughly with a clean towel to prevent the growth of new contaminants.
Step 9: Reassemble and Plug In
With all components now clean and dry, reassemble your ice maker. This includes putting the ice bin and any other removed parts back in their respective places. Once everything is back in position, plug in your ice maker.
Step 10: Fresh Ice
Your ice maker is now sparkling clean and ready to produce fresh, odor-free ice. Run a few cycles to ensure that any remaining traces of cleaning agents are thoroughly flushed out. Once the ice cubes are clean and free of odors, you can confidently enjoy your ice again.
Pro Tips for Ongoing Maintenance

Maintaining a clean and odor-free ice maker doesn’t end with a single cleaning session. Here are some pro tips to help you keep your ice maker in top-notch condition:
- Regular Visual Inspections: Make it a habit to regularly inspect the ice bin and other components for any signs of mold, mildew, or strange odors. If you notice anything amiss, clean the affected areas promptly.
- Replace Water Filter: Follow the manufacturer’s recommendations regarding the replacement of your ice maker’s water filter. A clean filter ensures that the water entering your ice maker is free from impurities and contaminants.
- Keep the Surroundings Clean and Dry: Maintain a clean and dry environment around your ice maker. Prevent any spills or moisture accumulation in the vicinity, as excess moisture can encourage mold growth.
- Regular Usage: If you have a standalone ice maker that doesn’t see regular use, consider running it periodically. Keeping the water and ice supply moving discourages stagnation and microbial growth.
- Water Softener: If you live in an area with hard water, consider using a water softener. Hard water can lead to mineral buildup in the ice maker, reducing its efficiency and promoting mold and bacteria growth.
Final Words
A clean and odor-free ice maker is essential for ensuring the safety and quality of the ice you enjoy in your beverages. Mold and bacteria can take root in neglected ice makers, leading to health concerns and unpleasant tastes and odors in your drinks.
Regular cleaning and maintenance of your ice maker is the key to avoiding these issues and prolonging the life of your appliance. So, don’t let your ice maker become a science experiment gone wrong. Take action, keep it clean, and savor the pure joy of ice-cold refreshment without any worries about mold or odors. Your taste buds and your health will thank you!
Remember, the key to clean and odor-free ice is regular maintenance. With the right tools, materials, and a proactive approach, you can enjoy ice that’s not only refreshing but also safe and pure. Don’t let your ice maker’s cleanliness be an afterthought—make it a part of your regular kitchen maintenance routine. Your beverages will taste better, and you’ll enjoy peace of mind knowing that your ice is as clean as can be!
Frequently Asked Questions (FAQ) about Ice Maker Cleaning: Preventing Mold and Odor
In this FAQ section, we’ll address some of the common questions people have about cleaning their ice makers to prevent mold and odor. If you have any concerns or queries about this important kitchen appliance maintenance task, you’re in the right place!
1. Why is it necessary to clean my ice maker?
Regular ice maker cleaning is essential to prevent the growth of mold, bacteria, and odor-causing contaminants. Neglecting cleaning can result in unhealthy ice and a decreased appliance lifespan.
2. How often should I clean my ice maker at home?
For most residential ice makers, a good rule of thumb is to clean them every three to six months. However, more frequent cleaning may be necessary if you use your ice maker heavily or live in a humid environment.
3. I’ve noticed mold and strange odors from my ice maker. What should I do?
If you observe mold, mildew, or odors coming from your ice maker, it’s essential to clean it immediately. Follow the step-by-step cleaning guide in our article to address these issues effectively.
4. Can I use any cleaning solution for my ice maker?
It’s recommended to use a solution of equal parts water and either white vinegar or lemon juice for cleaning the interior of your ice maker. Additionally, use a sanitizing solution designed specifically for ice makers to ensure safety.
5. Is it safe to use ice from an unclean ice maker?
Consuming ice from an unclean ice maker poses potential health risks. Mold and bacteria can lead to allergies, respiratory problems, and gastrointestinal issues. Regular cleaning is necessary to ensure safe ice.
6. Can I use bleach to clean my ice maker?
It’s generally not recommended to use bleach for ice maker cleaning, as it can leave behind chemical residues that may be harmful if ingested. Stick to natural, food-safe cleaning solutions like vinegar or lemon juice.
7. How can I maintain my ice maker in between cleanings?
Regularly inspect the ice bin and other components for any signs of mold, mildew, or strange odors. Also, follow the manufacturer’s recommendations for replacing the water filter and keep the surroundings clean and dry to prevent moisture buildup.
8. Should I run my ice maker regularly, even if I don’t need ice constantly?
Yes, it’s a good practice to run your ice maker periodically, even if you don’t need ice frequently. Running it ensures that the water and ice supply remains in motion, preventing stagnation and microbial growth.
9. Can hard water affect my ice maker’s performance and cleanliness?
Yes, hard water can lead to mineral buildup in the ice maker, reducing its efficiency and promoting mold and bacteria growth. Consider using a water softener if you live in an area with hard water.
10. Are there any risks associated with ice maker cleaning?
The primary risk associated with ice maker cleaning is electrical safety. Always unplug the ice maker before cleaning to avoid accidents. Additionally, be cautious when using cleaning solutions and follow safety instructions.
11. Can I clean a commercial ice maker myself, or should I hire a professional?
You can clean a commercial ice maker yourself if you follow the manufacturer’s instructions and use appropriate cleaning materials. However, due to the complexity and size of commercial units, some businesses opt to hire professional technicians for regular maintenance.
12. What’s the biggest benefit of regularly cleaning my ice maker?
The most significant advantage of cleaning your ice maker regularly is ensuring that you have a constant supply of safe, clean, and odor-free ice cubes for all your beverages. It also extends the life of your appliance and helps maintain its efficiency.
13. Is it safe to use ice from a recently cleaned ice maker right away?
After cleaning your ice maker, run it through a few cycles to ensure that any residual cleaning agents are flushed out. Once the ice cubes are clean and odor-free, it’s safe to use them in your drinks.
